
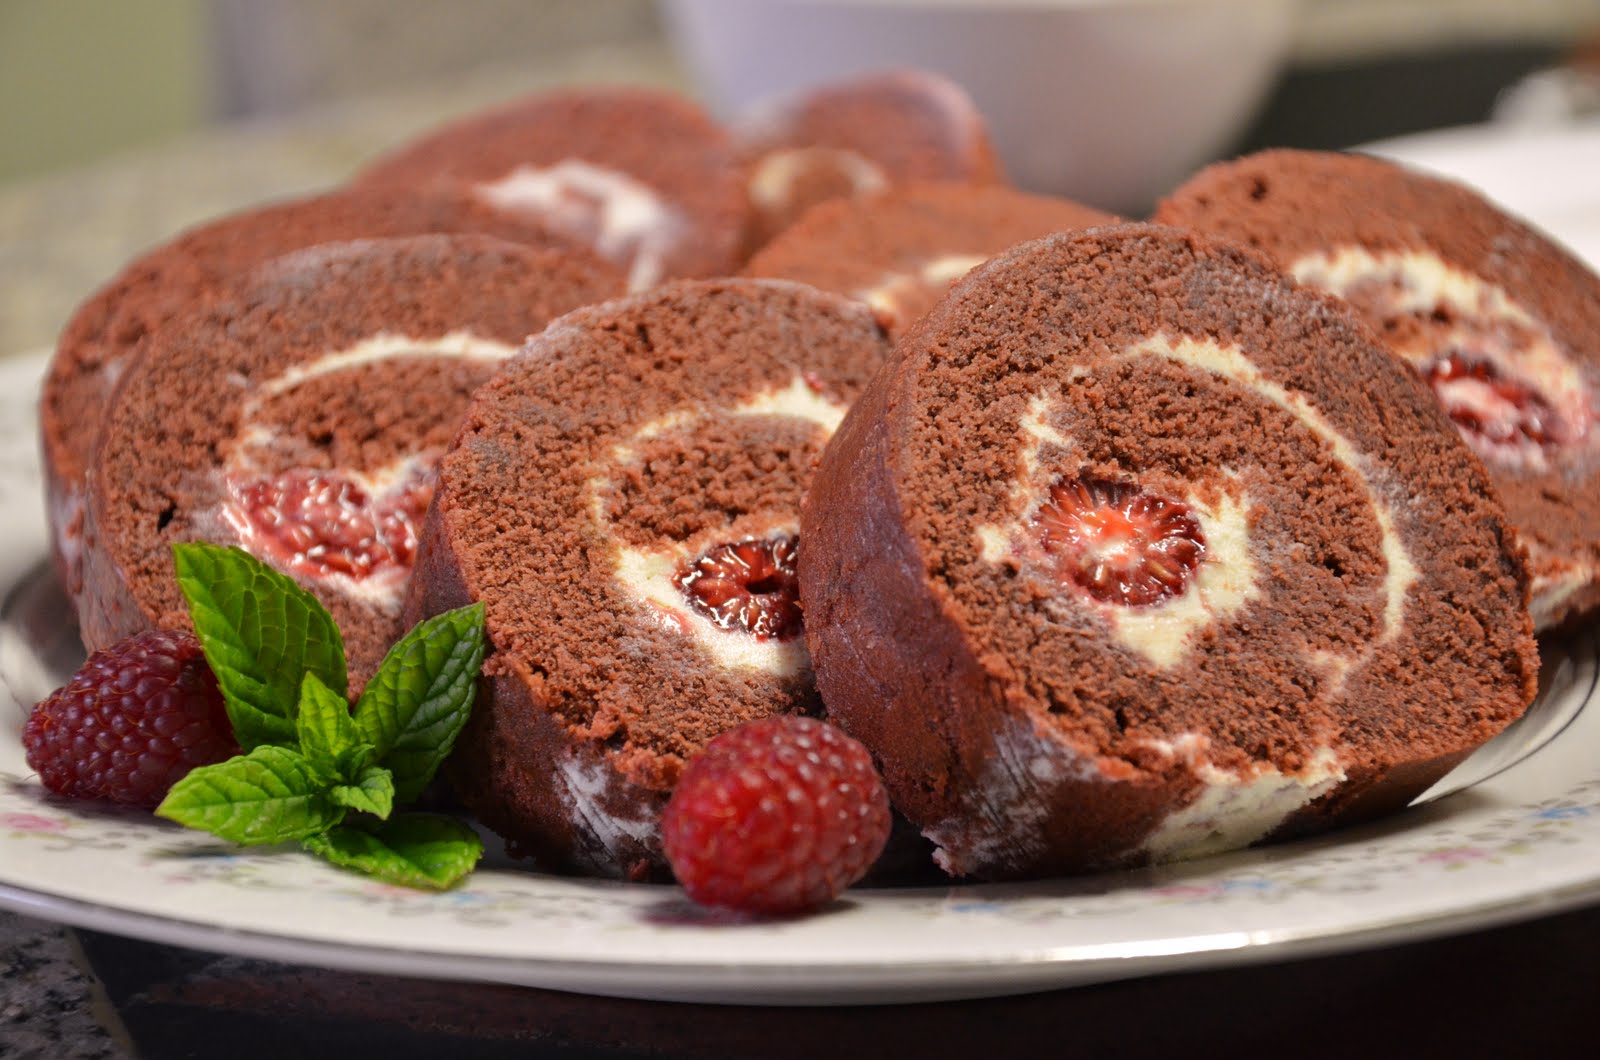
So here is the Red Velvet Roulade Cake that I chilled over night. And all I have to say is, "I flippin' love it!!"
Recipe Courtesy of Flo Baker
Red Velvet Cake
Ingredients
For the cake
- 1 cup (4 1/2 ounces) all-purpose flour
- 2 tablespoons unsweetened natural cocoa powder
- 1/2 teaspoon baking soda
- 1/8 teaspoon salt
- 1/2 cup (4 fluid ounces) milk
- 1 teaspoon pure vanilla extract
- 1 teaspoon 1 teaspoon apple cider or white vinegar, 5% acidity*
- 4 ounces unsalted butter , at room temperature
- 3/4 cup (5 1/4 ounces) granulated sugar
- 1 large egg, lightly beaten
- 1 tablespoon liquid red food coloring (1/2 fluid ounce)
For the white chocolate–cream cheese
- One 8-ounce package cream cheese, at room temperature
- 5 ounces white chocolate, melted
- 2 ounces unsalted butter, softened
- 1/3 cup (1 1/4 ounces) powdered sugar, sifted
- 1 teaspoon pure almond extract
- 1 cup (4 to 5 ounces) red raspberries, picked over for stems (optional)
For decoration
- Powdered sugar for decoration
- Red raspberries, picked over for stems, for serving
Directions
Make the cake
1. Center a rack in the oven and preheat the oven to 375°F (190°C). Coat a small area in the center of a 15 1/2-by-10 1/2-by-1-inch pan (jelly-roll pan) with nonstick spray. Line the pan with aluminum foil, pressing the foil into the contours of the pan and leaving a 2-inch overhang at each short end (the spray anchors the foil in place to make buttering easier). Butter the foil, then flour it, tapping out the excess flour. Have all of the ingredients at room temperature.
2. Sift together the flour, cocoa, baking soda, and salt onto a sheet of waxed paper; set aside. In a small bowl, stir together the milk, vanilla, and apple cider. In the bowl of a stand mixer fitted with the paddle attachment, beat the butter on medium-low speed until creamy and smooth, about 1 minute. Increase the speed to medium and add the granulated sugar in a steady stream. Continue to beat until light in color and fluffy in texture, about 2 minutes, stopping the mixer occasionally to scrape down the sides of the bowl.
3. With the mixer on medium speed, add the egg slowly, about 1 tablespoon at a time, beating after each addition until incorporated and stopping the mixer occasionally to scrape down the sides of the bowl. On the lowest speed, add the flour mixture in two or three additions alternately with the milk mixture in one or two additions, beginning and ending with the flour mixture and mixing after each addition only until incorporated smoothly. Stop the mixer after each addition and scrape down the sides of the bowl. Maintaining the same speed, add the food coloring and mix well to color the batter evenly. Without delay, spoon the batter into the prepared pan, spreading evenly with a rubber spatula.
4. Bake the cake until it is set on top and springs back when lightly pressed in the center, about 10 minutes. Transfer the pan to a wire rack. If necessary, run a thin knife blade around the perimeter of the pan to loosen the cake sides. Then pull up on the foil overhang and carefully transfer the cake to a wire rack. Without delay, place a sheet of foil over the cake and manipulate the foil to make a shallow tent (a tent holds in the moisture as the cake cools, but prevents the foil from sticking to the cake). Let cool for about 45 minutes, then proceed to assemble the dessert.
7. Using an offset spatula, spread 1 cup plus about 2 tablespoons of the filling evenly over the cake, leaving a 1/2-inch border uncovered on the long side farthest from you. (The leftover filling, along with a few berries, makes a good kitchen snack for the baker.) Place the raspberries, if using, randomly on the filling along the length of the cake.
8. Begin rolling the cake by flipping the edge nearest you over onto itself. Then, with the aid of the foil that extends beyond the short sides, roll up the cake lengthwise until you reach the far long side. As you work, wrap the foil around the roll to assist in rounding the shape (otherwise the cake will stick to your hands). To insure the roll is uniform, place the roll in its foil across the bottom third of a 24-inch-long piece of parchment paper, bring the top edge of the paper toward you, and drape it over the cake roll, allowing a 2-inch overhang.
9. Place the edge of a rimless baking sheet at a 45-degree angle to the roll and your work surface. Apply pressure against the roll, trapping the 2-inch overhang, and push while simultaneously pulling the bottom portion of paper toward you. This push-pull motion creates a resistance that results in compressing the log into a uniform shape. If any cracks appeared as you rolled the cake, they are consolidated in this compression and disappear from view.
10. Carefully lift the roll in the aluminum foil and set it, seam side down, on the fresh sheet of foil. Wrap the cake securely in the foil. Transfer the foil-wrapped roll to the baking sheet or shallow tray and refrigerate for about 30 minutes to help set the filling.
2. Sift together the flour, cocoa, baking soda, and salt onto a sheet of waxed paper; set aside. In a small bowl, stir together the milk, vanilla, and apple cider. In the bowl of a stand mixer fitted with the paddle attachment, beat the butter on medium-low speed until creamy and smooth, about 1 minute. Increase the speed to medium and add the granulated sugar in a steady stream. Continue to beat until light in color and fluffy in texture, about 2 minutes, stopping the mixer occasionally to scrape down the sides of the bowl.
3. With the mixer on medium speed, add the egg slowly, about 1 tablespoon at a time, beating after each addition until incorporated and stopping the mixer occasionally to scrape down the sides of the bowl. On the lowest speed, add the flour mixture in two or three additions alternately with the milk mixture in one or two additions, beginning and ending with the flour mixture and mixing after each addition only until incorporated smoothly. Stop the mixer after each addition and scrape down the sides of the bowl. Maintaining the same speed, add the food coloring and mix well to color the batter evenly. Without delay, spoon the batter into the prepared pan, spreading evenly with a rubber spatula.
4. Bake the cake until it is set on top and springs back when lightly pressed in the center, about 10 minutes. Transfer the pan to a wire rack. If necessary, run a thin knife blade around the perimeter of the pan to loosen the cake sides. Then pull up on the foil overhang and carefully transfer the cake to a wire rack. Without delay, place a sheet of foil over the cake and manipulate the foil to make a shallow tent (a tent holds in the moisture as the cake cools, but prevents the foil from sticking to the cake). Let cool for about 45 minutes, then proceed to assemble the dessert.
Make the white chocolate–cream cheese filling
5. In a bowl of the stand mixer fitted with the paddle attachment, beat the cream cheese on medium-low speed until smooth. Pour in half of the chocolate and beat until smooth, stopping the mixer occasionally and scraping the mixture clinging to the sides into the center of the bowl. Pour in the remaining chocolate and beat just until combined. Add the butter and then the sugar and almond extract and beat until smooth and creamy. Use right away, or store in a covered container in the refrigerator. When ready to use, remove from the refrigerator, bring to room temperature, and beat with a rubber spatula, small whisk, or fork until smooth and creamy. You should have about 1 1/3 cups.Assemble the cake
6. Remove the foil from the top of the cake. Transfer the cake on its bottom sheet of foil to a work surface, placing it so that one of its long sides is parallel to the edge of the surface closest to you. Place another long sheet of aluminum foil on the work surface nearby.7. Using an offset spatula, spread 1 cup plus about 2 tablespoons of the filling evenly over the cake, leaving a 1/2-inch border uncovered on the long side farthest from you. (The leftover filling, along with a few berries, makes a good kitchen snack for the baker.) Place the raspberries, if using, randomly on the filling along the length of the cake.
8. Begin rolling the cake by flipping the edge nearest you over onto itself. Then, with the aid of the foil that extends beyond the short sides, roll up the cake lengthwise until you reach the far long side. As you work, wrap the foil around the roll to assist in rounding the shape (otherwise the cake will stick to your hands). To insure the roll is uniform, place the roll in its foil across the bottom third of a 24-inch-long piece of parchment paper, bring the top edge of the paper toward you, and drape it over the cake roll, allowing a 2-inch overhang.
9. Place the edge of a rimless baking sheet at a 45-degree angle to the roll and your work surface. Apply pressure against the roll, trapping the 2-inch overhang, and push while simultaneously pulling the bottom portion of paper toward you. This push-pull motion creates a resistance that results in compressing the log into a uniform shape. If any cracks appeared as you rolled the cake, they are consolidated in this compression and disappear from view.
10. Carefully lift the roll in the aluminum foil and set it, seam side down, on the fresh sheet of foil. Wrap the cake securely in the foil. Transfer the foil-wrapped roll to the baking sheet or shallow tray and refrigerate for about 30 minutes to help set the filling.
To serve
11. Remove the cake from the refrigerator and peel off and discard the foil. Carefully lift the roll onto a serving plate with the aid of a long, wide spatula or a rimless baking sheet. (If not serving right away, cover loosely with plastic wrap to keep the cake’s surface from drying out and return to the refrigerator to serve the same day.) Dust the cake with powdered sugar. Using a serrated knife and a sawing motion, cut the roll into 1/2-inch-thick slices. Center each portion on a dessert plate. Accompany with the raspberries.
0 comments:
Post a Comment